Tuesday, December 30, 2008

Thai Omelette

Thai Omelettes don't differ much from normal Western Style omelettes except for the amount of oil you use and what you cook it in. Thai Omelettes tend to be fluffier and greasier - the faint of heart should not attempt to eat one.

1. Heat up a considerable amount of oil in a wok [and I mean considerable - at least a cup]. While it is heating up you can beat your eggs in a bowl with whatever else you want to add in. Usually Thai Omelettes are made only with egg and no ingredients because you eat it with rice or with steamed/boiled vegetables. For example when I made an omelette with my parents we ate it with a vegetable and pork stirfry. [I will write later about how to make that].
2. When the oil is heated up [give it a couple minutes] you can add the egg into the wok. It cooks very fast so use a flipper to check to see if the bottom is done and then flip it over [no fancy tossing - there's too much oil in there].
3. When both sides are a nice golden brown - VOILA! You are finished :)

Wednesday, December 3, 2008

Cookies Thai Style

The ingredients you will need to make the cookies are:

1. แป้งสาลีพัดโบก 500 g [cake flour]
2. แป้งสาลีว่าว 200 g [all purpose flour]
3. นำตาลไอซิง 330 g [icing sugar]
4. เนยสด 110 g [butter]
5. มารการีน 370 g [margarine]
6. ผงฟู 1 tbsp [baking powder]
7. เกลือ 1/4 tbsp [salt]
8. กลินวานิลา 1 tbsp [vanilla flavouring]
9. กลินนมเนย 1 tbsp [buttermilk flavouring]
10. ไข่ 2 [eggs]
11. งา / ลูกเกด / ถัว 200/300 g [sesame/peanuts]

A. Weigh and sift the cake flour [500g], all purpose flour [200g], salt [1/4 tbsp] and baking powder [1 tbsp]. Sift three times.
B. Mix in the icing sugar [330g] and sift again.
C. In a mixer, beat together the butter [110g] and margarine [370g] for 3 minutes.
D. Add the eggs [2] and mix for another 2 minutes.
E. While mixing on a low speed, add in the dry ingredients and beat for 3 minutes.
F. Add in the vanilla flavouring [1 tbsp] and buttermilk flavouring [1tbsp], then mix in the nuts with a spoon so you don't break the mixer.
G. Drop the cookies onto a greased tray and bake in a 250 degree oven for 15 minutes. [Depending on how thick you make the cookies it could take longer/a higher temperature].

If you can't find buttermilk flavouring, I'm sure you could vido it from the recipe :)

Peace and Love <3

"Thai Spaghetti" ie Canadian spaghetti... with ketchup

Thai people like to think that this is "ahan falang" [foreigner food], but this is definetely not the way that foreigners eat spaghetti. So, I consider it "Thai food".

Cut the following into small pieces to make the spaghetti sauce:

พริกไทย chile peppers
แครอท carrot
มะเขือเทศ tomato
พริกหยวก green/yellow peppers
หอมหัวใหญ่ onion
หมู pork
ฮอทด็อก hotdogs

Put on a pot of boiling water, and season the water with salt before you add the pasta.
While your pasta is cooking you can start the sauce.

In a wok add some oil and wait until the oil is hot before adding the pork and the hotdogs.
When the pork is fully cooked [it should be brown, not red] you can add the vegetables.
Once the vegetables and meat are cooked fully, turn the heat down and add:

ซอสมะเขือเทศ ketchup

That's right, ketchup. You only need to keep it on the heat for a little longer and then turn the heat off while you mix in the ketchup. Your noodles should be done, you can strain them and pour the sauce overtop.

VOILA!!

Thursday, November 20, 2008

Salad and Steak Moong Yor

Today was my first official cooking class at school. Actually, it wasn't official, I just dropped in at the room and said "I'm studying with your class this period." Everyone was super friendly though - the class was M3/8 [grade 9's] and they taught me to write out the recipe in THAI!
That's exciting. First we made salad dressing:

1. Beat together 10 eggs with an electric beater.
2. Over medium heat, simmer together in a saucepan:
3 1/2 cups of sugar
1 cup of vinegar
1 tablespoon of salt
1/2 glass of water
Once you have simmered this for a while and it has mixed together, you can beat it in with the eggs using the electric beater.
3. Slowly add 1 L of vegetable oil in with your sauce, while still mixing with the electric beater. The sauce should start to thicken and look more like a salad dressing. Then, add a whole can of condensed milk.
4. Finally, add 2 tablespoons of mustard and a cup of mayonnaise in with your sauce.

We served the salad dressing over a mixed fruit dish, but you can serve it over anything. Some ideas for your salad:
Lettuce, Cucumbers, Tomatoes, Carrot, Dragonfruit, Apple, Guava, Pineapple, Beans, Nuts, Chicken, Pork, Jellies, Radish, Orange etc.

Thai people put EVERYTHING in their salads.
Next, we made "Steak moong yor" > there is no English translation but I would describe it as a pork meatball, battered and deepfried. It also tastes good with the salad dressing.
To make the meatballs we used two different kinds of pork - I don't know what kind because, again, there is no English translation as pork is not prepared this way in Canada. However, any kind of pork would do.
1. Pound the meat until it has a similar texture to ground beef.
2. Depending on your personal taste, add in the following:
Diced onions
Soya sauce
Pepper
3. Next, prepare your batter. Whisk together in a bowl:
1 cup of all purpose flour
2 tablespoons of oil
1/2 cup of cold water
1/2 teaspoon of baking powder
4. Heat up a wok over medium heat and fill it with enough oil to cover the patties.
5. Take handfuls of your meat mixture, form them into circular, flat patties and cover them them in the batter. Thenslowly and carefully drop them in the oil. Keep the patties from sticking to each other and when they are a golden brown you can remove them with a hand strainer and let them cool on a rack over a grease tray.
6. If you want to be SLIGHTLY healthier [not that this is much of a diet recipe to begin with] you can skip battering the patties and fry them the way they are.
Again, You can eat Steak Moong Yor with the salad dressing recipe from above, and they are also good with soya sauce. I also assume that you could eat it with rice [everything is eaten with rice in Thailand].

Wednesday, October 8, 2008

Sweet Chicken Stew [I forget the Thai name so I made one up]

This particular dish is eaten over steamed rice, but you could eat it with any kind of rice you want, or as a stew!

First, you need to start with a wok [oh, classic Asian cooking] and start to fry some minced garlic and chicken. We used drumsticks but whatever kind of chicken you want to eat is good. I'm assuming you could eat it with pork or beef if that is your preference, or you can vido the meat all together and add vegetables of your choice later. Once the chicken is partially cooked add in cinnamon and sugar.. LOTS of sugar. How much sugar depends on how sweet you want it to be, but the dish is traditionally sweet - that should give you a guideline. I believe we put in a cup of sugar. Keep stirring so the sugar and cinnamon don't burn until the chicken is fully cooked.

Then you are ready to start your stew. Add to the wok enough water to almost cover the chicken, but not drown out the flavour. Keep the water simmering and add brown sugar [again it depends on how much you would like to put in.. we put in another half a cup].

While your stew is simmering, boil some eggs [however many you would like]. When they are finished cooking, cool them in an ice bath so you can peel them right away. Once they are peeled you can add them to your stew in the wok. Add more water if necessary. Then, let your stew simmer for 30 minutes before eating.

Like all Thai dishes, we all had our own plate of steamed rice and the bowl of stew was a community bowl that everyone ate from. The traditional Thai style of eating is to take 2 or 3 spoonfuls of stew/eggs/chicken and pouring it over your rice. Once you are finished that part of your rice you can get another 2 or 3 spoonfuls. More than that 2 or 3 spoonfuls is ... weird :) But, as you probably don't live in Thailand, you can eat it whatever way you would like.

I'll try to get the pictures I have on this as soon as possible, sorry for the long wait.

"It is not in the stars to hold our destiny, but in ourselves"

Saturday, September 20, 2008

Sticky Rice - Khao Neeow [The basis of everything]

Sticky Rice
Many dishes in Thailand are made with Sticky Rice. Not only is sticky rice a staple for dinner and lunch, but for breakfast and dessert as well. The particular dish I learned how to make with Sticky Rice was called "Khao Neeow Sung Kai Ya". However, I figured I would first make a blog post explaining the basic principles of sticky rice first as it has it's own special cooking methods.

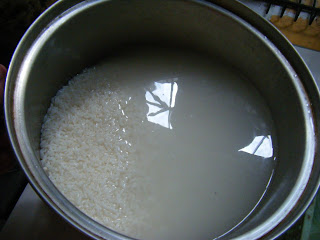
First you need to soak the sticky rice in cold water over night. If you are in a hurry you can soak it for an hour, but most people who I ask tell me you should soak it over night.

After the sticky rice has soaked in water you need to start boiling water in a pot [like this one, however if you don't have one like this I'm sure you could use any pot that would fit]. You need to transfer the sticky rice into the wooden basket [or another pot that fits over top of your larger pot] and steam it for 30 minutes to an hour with a cover. Check it, but not too often until it has a sticky but soft consistency.

This is what sticky rice is supposed to look like when it is finished. In Thailand they use a wide wooden circular plate, but I'm sure you could use any sort of plate to spread out the Sticky Rice and let it cool down before you put it away. You can eat it right away [I love sticky rice with salt] or you can save it [at room temperature]. In Thailand they use small baskets to store their Sticky Rice. If you happen to have something like that lying around the house, that would be your best bet. If you have any other storage container, that would probably work as well.

You can eat sticky rice by itself with salt, or with other meals. I like to eat it with Som Tam and I dip it in the sauce that is on the Som Tam. It is also very popular to eat sticky rice with pork or fish :)

Friday, August 29, 2008

Korean Barbecue

Hello friends, and welcome to my first post about Thai Cooking. So the first dish I personally made with friends is actually Korean, but seeing as all types of Asian food are popular in Thailand [particularly Vietnamese] I thought I might as well document every moment so that you can learn, and if you want attempt to make this meal!


KOREAN BARBECUE

The first picture is a picture of what the actual Korean Barbecue looks like. I am going to make the safe assumption that most people who are reading this do not have this contraption, but if you do you are in luck! The top bit is a metal pan, almost like a frying pan that is deep so you can make soup. The inside is domed upwards to form the actual barbecue area. The holes are for the fat to drip through so it doesn't get in the soup. The wooden bucket underneath is placed on top of a piece of cement so that it can stand sturdy and not burn the floor. Inside the wooden bucket is where you light the coals. This dish is prepared and enjoyed at the same time, everyone takes part in the cooking of the meal. You sit on the ground while you cook and eat :)


The first thing you do after lighting the coals is to place a big piece of fat on the top of the barbecue to somewhat grease the barbecue for the meat. You need to keep flipping the fat around until it is completely cooked through at which time you need to supply a new piece of fat. Some people [like my friend Pooh] eat the fat after it has been completely used up but I have not been brave enough to eat a lump of fat yet, so I wouldn't be the best person to ask to explain the taste. I assume it tastes like regular fat, whatever that tastes like. There were nine of us at Aom's birthday party when I first tried the Korean Barbecue and we split up between two different barbecues. You eat straight from the barbecue so if you have a big group of people for this meal it would be ideal to have more than one cooking station.


Once the barbecue has heat up a bit, you can start to add stock to the pan. We used chicken stock, but I assume it would taste fine with whatever type of stock you prefer. Most things you cook with in Thailand you buy from the market that are already prepared. The stock was bought prepared, the meat was bought cut up in a bag of blood and water and the ingredients for the soup were prepared together in a bag. Chopsticks do not originate from Thailand, but because Thailand is close to so many countries, they have adapted the use of chopsticks for meals such as the Korean Barbecue. You use chopsticks to place meat on the barbecue and pick it back up. You also use them to rotate the fat and to take noodles and plants out of the soup. You can use your hands to put the ingredients into the soup, but then you use chopsticks to submerge them in the stock. You can eat this by picking things out with chopsticks and eating them normally, or you can pick things out with stock and eat it like a soup with a special type of spoon. Like most Thai dishes, this meal is enjoyed by everyone using their own utensils to serve themselves. Thai people do not use serving utensils unless it is a buffet, you stick your own chopsticks, spoon or fork into whatever is on the table and help yourself. Actually, you rarely go out for dinner and have a dish for yourself, everything is shared.


In the barbecue you can really put whatever you would like. You can use any type of noodle and any type of vegetable. You also have the choice of adding the meat into the soup or grilling it on the dome of the barbecue. For ours we used cabbage, mint leaves [and lots of them] as well as different types of lettuce. We added onion and a couple of other plants that you cannot find in Canada. They somewhat resemble bean sprouts but are definetely not the same. We used pork for our barbecue as well as cow stomach and liver. I wasn't brave enough to try the cow stomach either, maybe when a fellow exchange student will try it with me, but I did try the liver and despite the fact that the texture tasted like sandpaper it wasn't that bad. The spoon in the picture is the spoon you use here for soup, rice etc. It's kind of a mix between a spoon and a ladle. My Thai friends also had a bowl of sauce to add to the food; I tried it and it was extremely spicy so I only used a little bit on a lot of food. I'm not sure how to make the sauce because it also came prepared at the market, but it is safe to say it had chile peppers in it, and if you are that interested, let me know and I will ask someone to explain how to make it.


There you have it, the Korean Barbecue :) If this wasn't as detailed as you had hoped, please let me know and I will do my best to explain better. Soon I will try to video some footage of cooking and hopefully I will be able to take a Thai Cooking course next semester. I did video some of this experience but it was mostly me pointing at things saying "This is where you cook the meat, and this is where you put the coals, and this is where you make the soup" with a lot of Thai chatter in the background and Suzanne expressing the fact that she had learned Thai cuss words.

Peace and Love,
Happy Cooking!


"I make a deal with myself. I can try anything that I have never tasted before. I already know what chocolate, tiramisu, pate, prime rib, smoked salmon, etc. taste like. Foods that I've never tried before and probably won't have the opportunity to sample at home are worth the exception"
- Laurie Armstrong